By Carmel Schvartzman
In this tutorial we'll learn how to create an AngularJS Resource, which will allows us to fetch data on the client side, using a RESTful API in our AngularJS Blogs Application.You can follow this step by step tutorial as a standalone, or you can learn all the posts to build the entire app. This is the STEP 11 in this walkthrough to design an end-to-end AngularJS client MVC app.
In the MODEL-VIEW-CONTROLLER architecture of AngularJS, a VIEW is related to a MODEL in the configuration step of the AngularJS app live, when we link it to some CONTROLLER.
This linking action is set in a Module, with the function of declaratively set how the AngularJS app should be bootstrapped. It's like the Main method in a program, setting the instantiation of the application.
Because AngularJS is based on the Dependency Injection paradigm, here is the place to configure the app injecting the functionality that we'll need.
In the Module, will must install an AngularJS ngResource, that supports RESTful server-side interactions and provides the $resource service, which we'll use afterwards.
This $resource service provides high level methods and therefore allows us to interact with the REST back end, without using the low-level $http service.
1. First, check that you have added the ngResource in the Module declaration, as we made in this tutorial.
2. Now, open the .js file which holds your javascript code ("Blog.js") and find the Controller that we linked to the View. This Controller will fetch the REST data from the back-end, and send it to the View.
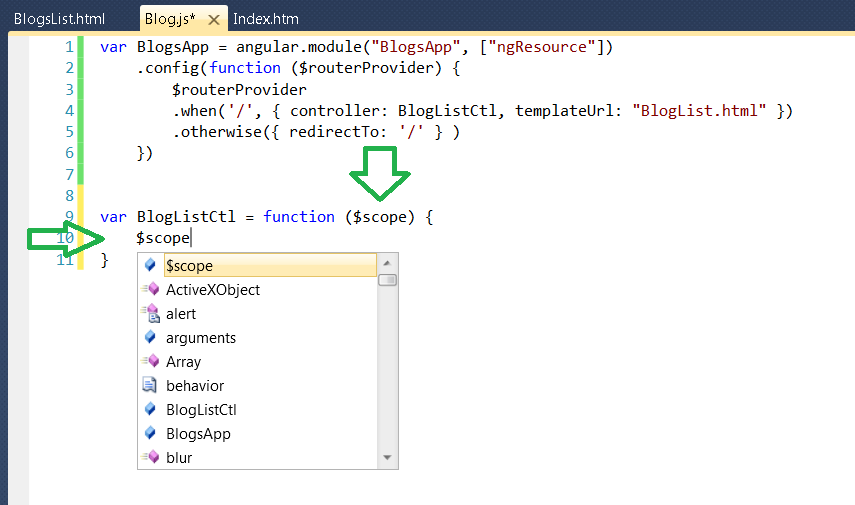
Take a look at the snapshot: it states that when '/' do link the "BlogListCtl" controller to the "BlogList.html" View:
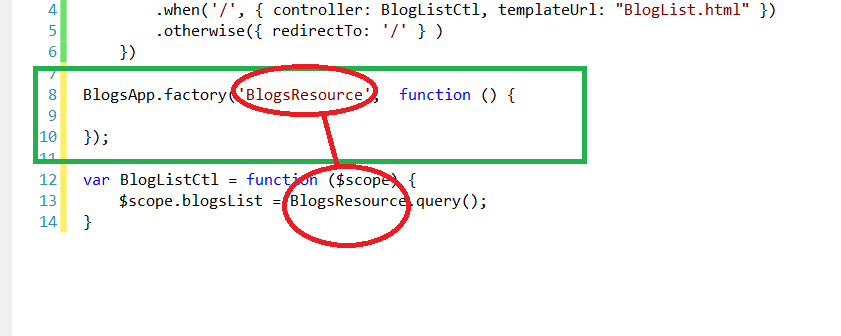
Therefore, we declare inside the BlogListCtl controller, a $scope attribute called "blogList", that will holds the posts list, from the BlogsResource service. To instantiate this service, we must create the above Factory, naming it exactly the same way we will at the Controller. Then we'll call the query() service's method. This method will make a request to the RESTful API of our application.
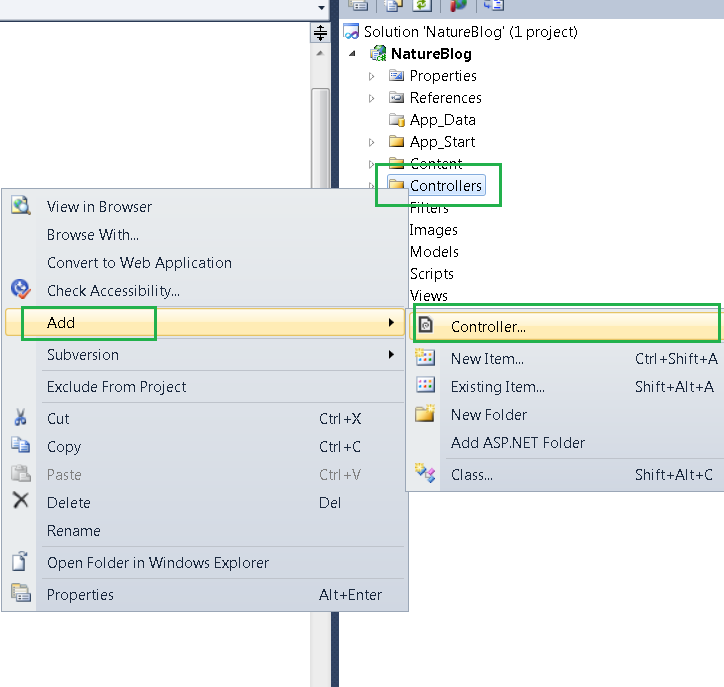
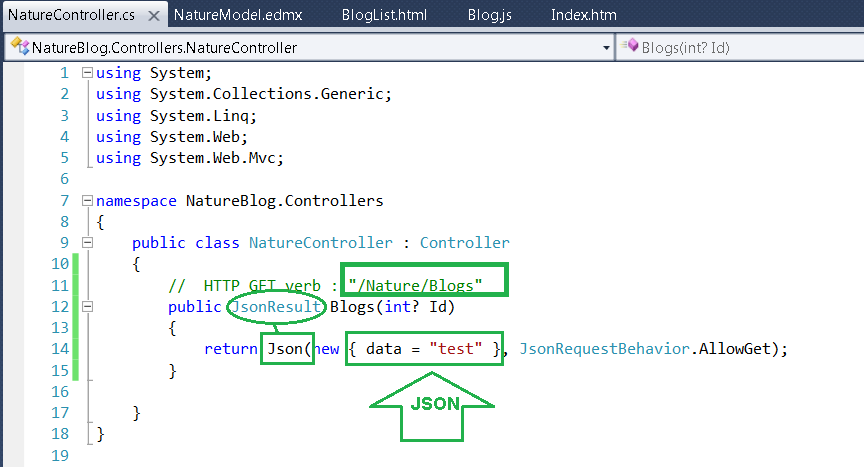
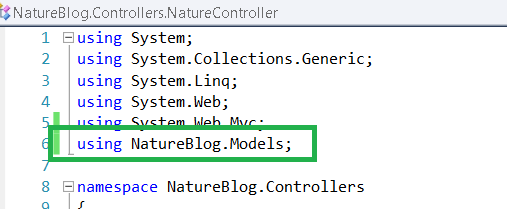
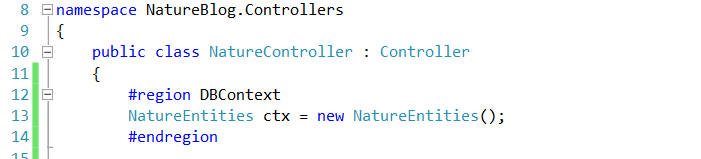
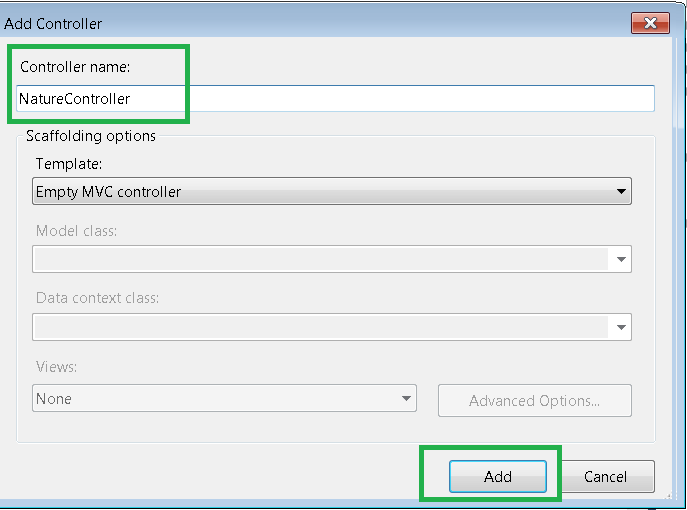
3. Let's write the REST action that reacts to the GET request made by our $resource service. Maybe you have already done that following the previous How to create an REST API back-end tutorial. If so, you can skip the next few steps. Elsewhere, create an empty MVC controller named "Nature":
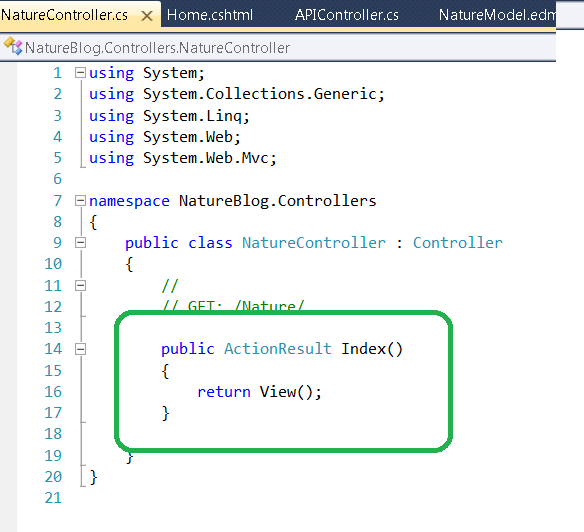
4. We automatically get an Index method:


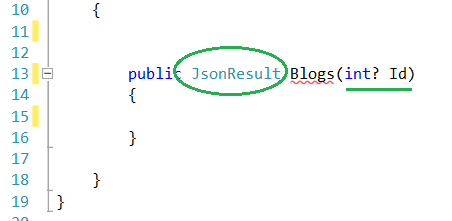
5. Add a Json object as the returned value:
 Notice that the Json object returns the data its get, in a JSON notation format.
6. Because we want the method to response to GET requests, the second parameter must be GET allowed:
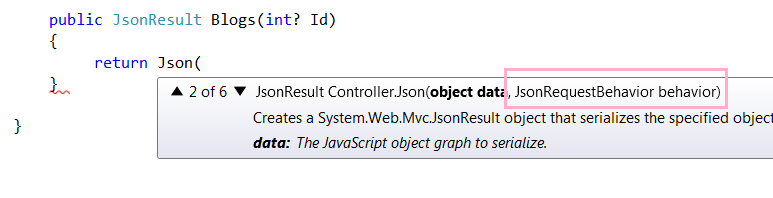
Therefore, pick "AllowGet" from the list:
 Next, replace the "new {}" instance with the data you want to return from the method. For the complete walkthrough to do that, see the previous How to create an REST API back-end tutorial.
7. Assuming you already built the RESTful back-end, get back to the Blog.js file, to continue with the creation of our $resource service. To see how to use an $resource service, let's take a look at the AngularJS.org's API documentation, at http://docs.angularjs.org/api/ngResource.$resource :

As you can see, the $resource uses an URL containing ":xxxx" parameters, that holds the arguments we send to the REST server. Those ":xxxx" parameters are defined in the same $resource instantiation, so let's code it the same way:
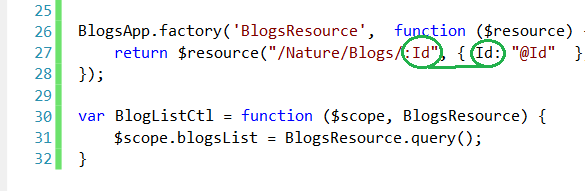
This code means that the call to the REST method includes the "Id" of the requested blog's post. Remember that if we don't send an Id, that means we want to fetch the ENTIRE list of posts.
Also, you'll notice that in the documentation example, there exists the declaration of an "charge" method, responding to a POST request. It is because the $resource service allows you to define your custom action as you wish:

The $resource service includes methods for all CRUD operations (Create Retrieve Update Delete) as the default set:

In the meantime we'll make use of the "query()" method to fetch all the posts. Also, add to the $resource service an "update" custom method, for the POST request, that we'll be using afterwards ("isArray" means that the returned data will be in an array disposition):

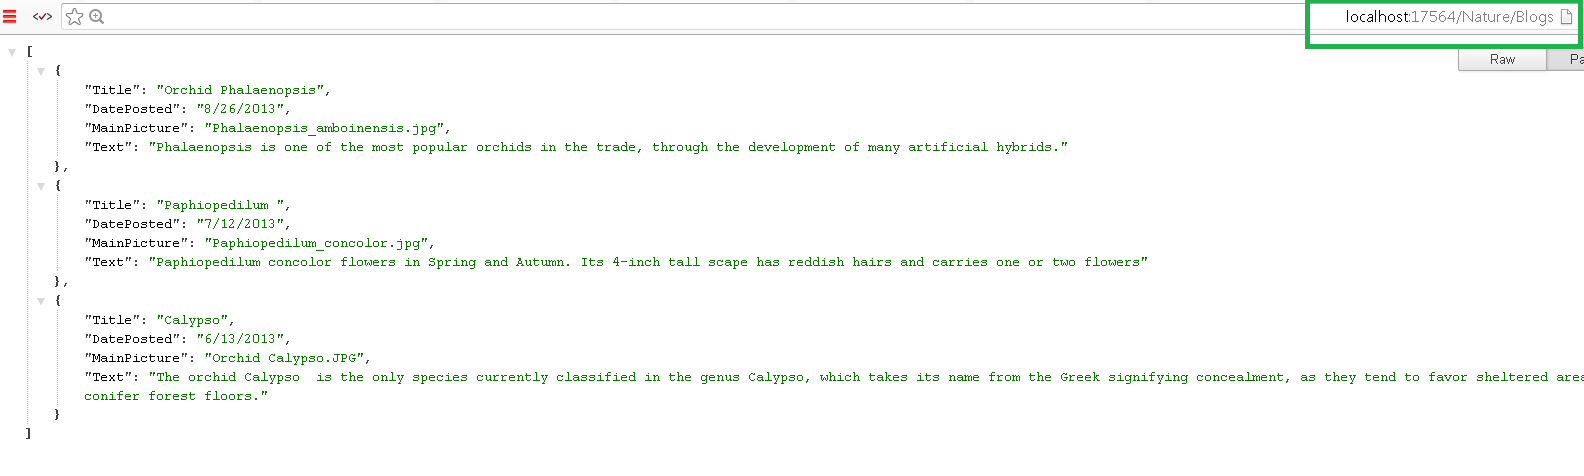
 Open the Developer Resources (F12) and at the "Network" tab select the Blogs.js script. There you can see the request made by our $resource service , and the 200 status code.
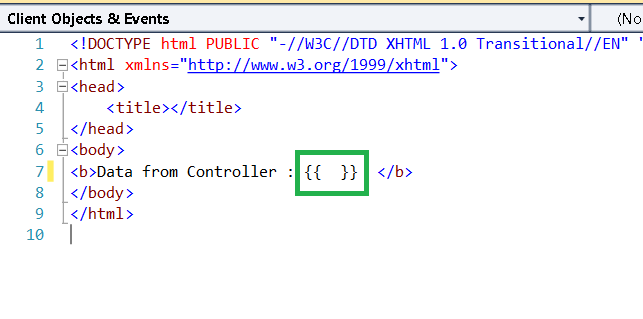
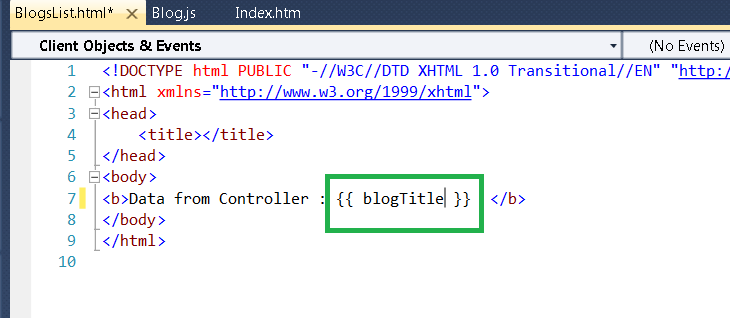
The AngularJS View should look like the following table:

That's all!!
Happy programming.....
This $resource service provides high level methods and therefore allows us to interact with the REST back end, without using the low-level $http service.
1. First, check that you have added the ngResource in the Module declaration, as we made in this tutorial.
2. Now, open the .js file which holds your javascript code ("Blog.js") and find the Controller that we linked to the View. This Controller will fetch the REST data from the back-end, and send it to the View.
Take a look at the snapshot: it states that when '/' do link the "BlogListCtl" controller to the "BlogList.html" View:
Therefore, we declare inside the BlogListCtl controller, a $scope attribute called "blogList", that will holds the posts list, from the BlogsResource service. To instantiate this service, we must create the above Factory, naming it exactly the same way we will at the Controller. Then we'll call the query() service's method. This method will make a request to the RESTful API of our application.
3. Let's write the REST action that reacts to the GET request made by our $resource service. Maybe you have already done that following the previous How to create an REST API back-end tutorial. If so, you can skip the next few steps. Elsewhere, create an empty MVC controller named "Nature":
4. We automatically get an Index method:
Instead of an ActionResult return ,we need JSON formatted data, so change the return type:
5. Add a Json object as the returned value:
6. Because we want the method to response to GET requests, the second parameter must be GET allowed:
Therefore, pick "AllowGet" from the list:
7. Assuming you already built the RESTful back-end, get back to the Blog.js file, to continue with the creation of our $resource service. To see how to use an $resource service, let's take a look at the AngularJS.org's API documentation, at http://docs.angularjs.org/api/ngResource.$resource :
As you can see, the $resource uses an URL containing ":xxxx" parameters, that holds the arguments we send to the REST server. Those ":xxxx" parameters are defined in the same $resource instantiation, so let's code it the same way:
This code means that the call to the REST method includes the "Id" of the requested blog's post. Remember that if we don't send an Id, that means we want to fetch the ENTIRE list of posts.
Also, you'll notice that in the documentation example, there exists the declaration of an "charge" method, responding to a POST request. It is because the $resource service allows you to define your custom action as you wish:
The $resource service includes methods for all CRUD operations (Create Retrieve Update Delete) as the default set:
In the meantime we'll make use of the "query()" method to fetch all the posts. Also, add to the $resource service an "update" custom method, for the POST request, that we'll be using afterwards ("isArray" means that the returned data will be in an array disposition):
Rebuild the application, and open the "Index.html" in the browser (http://localhost:XXXXX/Index.htm#/):
The AngularJS View should look like the following table:
That's all!!
Happy programming.....
כתב: כרמל שוורצמן