By Carmel Schvartzman
In this tutorial we'll create 3 tables in SQLSERVER 2008 , to store our Blogs Application. You can follow this step by step tutorial as a standalone, or you can learn all the posts to build the entire app. This is the STEP 1 in this walkthrough to design an end-to-end AngularJS
client MVC app.
First, let's create a "Blog" table, containing the following
columns:

The column BlogID will be the PRIMARY
KEY, so let's declare it that way, also setting its "IDENTITY
SPECIFICATION" to "yes":

This will increment the BlogID in 1 each
time we add a new record to the table.
Next, add a new table called "Comment", with the following columns:
Next, add a new table called "Comment", with the following columns:
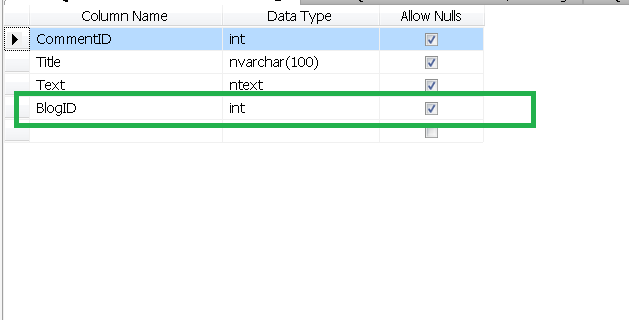
Select the CommentID column, and right-click the mouse:
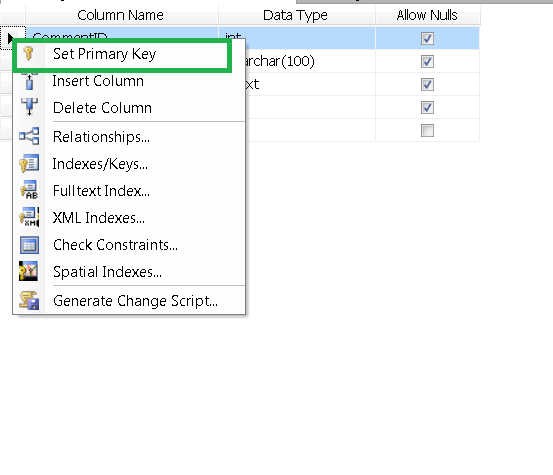
Click "SET PRIMARY KEY".
Now the primary key icon appears on the CommentID column:

Next, select the CommentID column and double-click "IS IDENTITY",
to set the automatic identity increment:

Now press CTL-S on the keyboard to save the table:

The table will be saved with the "Comment" name.
The third table is the one which holds the names of the bloggers.


The third table is the one which holds the names of the bloggers.
Add
the following columns , and set BloggerID as the PRIMARY KEY:
Next,
set the IDENTITY INCREMENT for this column:
Finally,
we'll establish the relationships between the three tables, creating FOREIGN
KEYS.
Open
the Comment table in the Object Explorer (press F8), and click "New
foreign key":
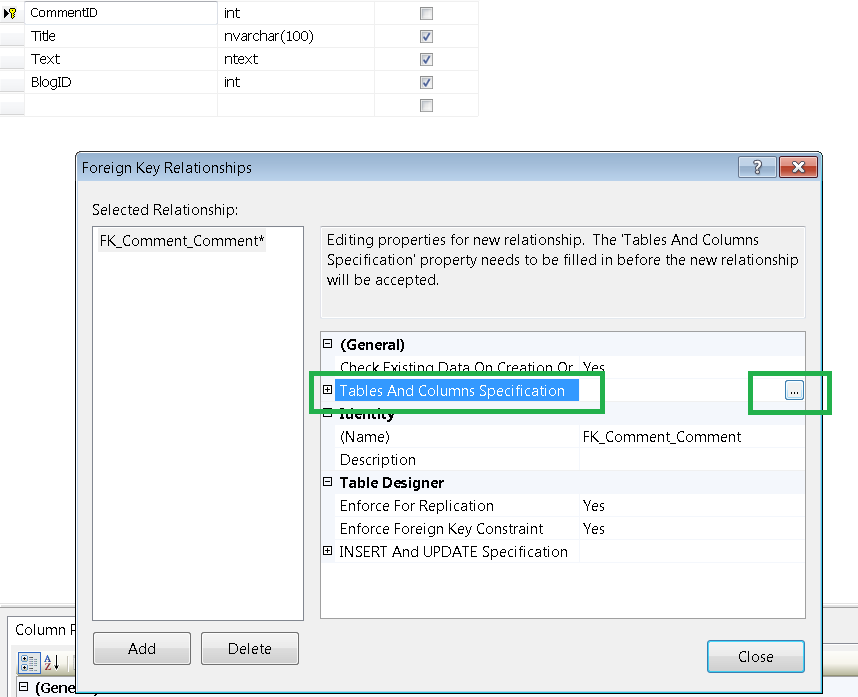
When
this dialog opens, press the button aside "Tables and Columns
Specification":
The
following dialog will open:
Don't
worry about the "Relationship name": the SQL management studio will
automatically set it ("FK_" means FOREIGN KEY).
You
can see that our "Comment" table has a "BlogID" column:
that is the name of the PRIMARY KEY of the "Blog" table. Therefore,
set "primary key table" =
"Blog" , and map both
"BlogID" columns.
Do exactly the same between the "Blog" table and the "Blogger" table , mapping the "BloggerID" columns.
Finally,
we'll build a DATABASE DIAGRAM showing the relationships between our 3 tables.
Open
the Object Explorer (F8):
Once there, pick from the tables list the 3 tables you just built, and close the dialog. You will have the Blogs database diagram we designed:
There you can see the ONE-TO-MANY relationships between our tables.
That's all…
Happy programming!!!
כתב: כרמל שוורצמן
No comments:
Post a Comment